- Your cart is empty
- Continue Shopping


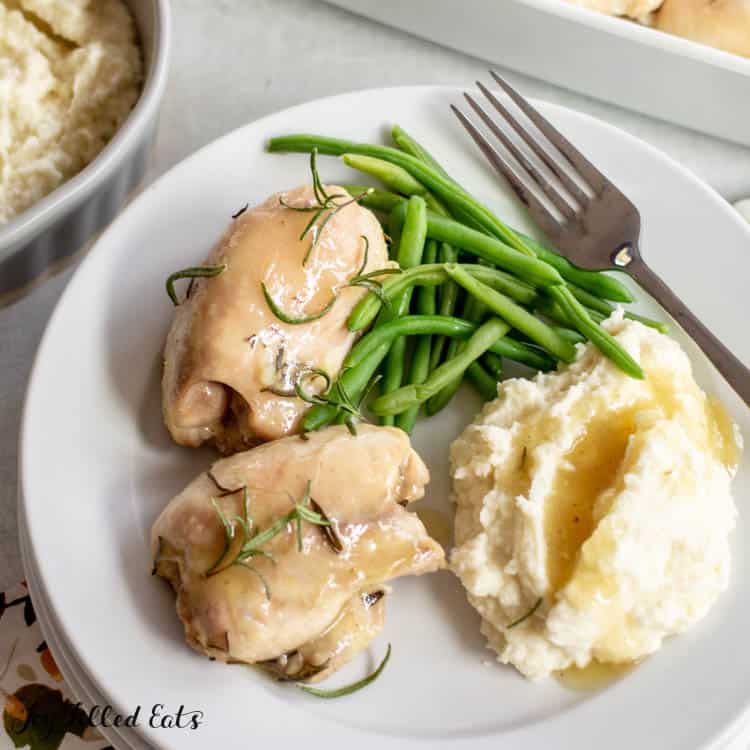
Best Easy Baked Rosemary Chicken Thighs Recipe


This baked rosemary chicken is incredible, and it comes together with just 5 ingredients! As soon as you taste the juicy chicken thighs, you are hit with an explosion of rosemary and garlic flavor that’s out of this world. It’s fast enough to make on a busy weeknight and fancy enough for a dinner party.

You know how much of a foodie I am, and you know that I want to serve the healthiest food possible. This easy recipe is one of my favorites for serving to friends and family.
The best part about this delicious meal is the whole family will enjoy it. Try this rosemary chicken recipe soon. I know you’ll love it.
Jump Start 2025
Want to really Jump Start your year? Sign up to get 31 days of recipes
Plus, you can pair this with some Roasted Green Beans or Keto Asparagus, and you have a meal that tastes so good you’d think a chef prepared it!
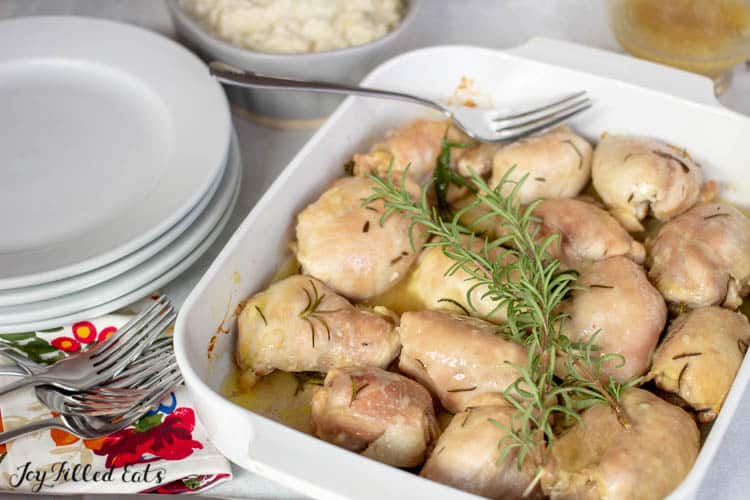
How To Make Baked Rosemary Chicken Thighs
Step One: Use a large casserole dish and add the chicken thighs in a single layer. Surround with the garlic cloves and rosemary. Sprinkle the boneless chicken thighs with extra virgin olive oil and kosher salt.
Step Two: Bake the rosemary chicken for 35-45 minutes in the preheated oven. Check the Skinless chicken thighs with a meat thermometer. When the internal temperature reaches 160 degrees on an instant-read thermometer, the baking dish can be removed from the oven.

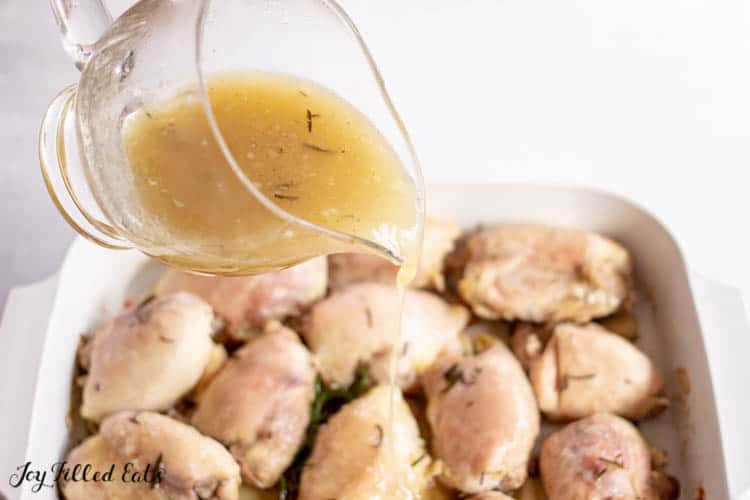
Step Three: Begin making the gravy after the chicken is done baking. Take the cooking juice from the chicken and put it in a small saucepan.
Top Tip💡
If you don’t have enough chicken juices to make 3 cups, go ahead and add in some chicken stock or vegetable broth.
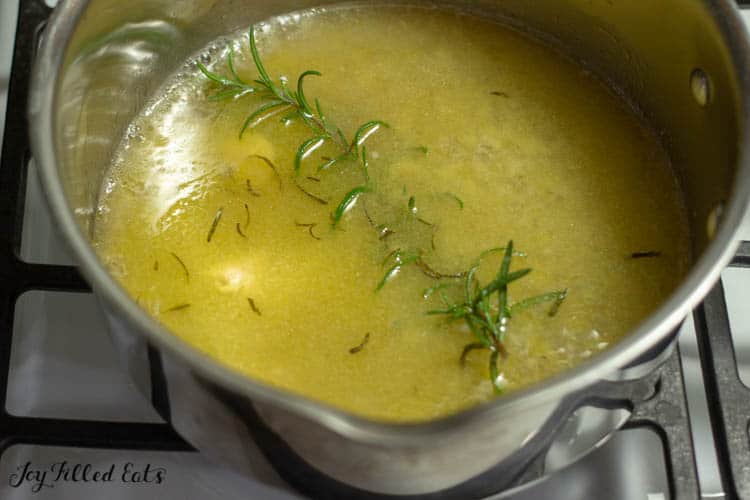
Step Four: Place the rosemary sprigs in the pan with the juice. Add in the xanthan gum. Cook the gravy over medium heat while whisking. Once it’s thickened, season with sea salt, black pepper, then serve with baked rosemary chicken. Serve with Mashed Cauliflower for a delicious dinner!
Variations
- Chicken – You can also make this with boneless skinless chicken breasts or chicken tenderloins. Just adjust the cook time accordingly.
- Skin on chicken – Love crispy skin? Go ahead and use skin on thighs. Place them skin side up in the baking dish and bake as directed until the chicken skin is crispy. You will need to use a gravy separator to separate the fat from the juice.
- Herbs – Any type of fresh herbs will work. Try using fresh thyme, basil, or sage in place of the rosemary.
- Garlic – Love garlic? Throw some extra fresh garlic cloves into the pan with the chicken. Or sprinkle with garlic powder.
- Citrus – Lemon slices or lemon zest are a nice flavor addition. We love lemon rosemary chicken thighs. You can also add a little lemon juice or a good splash of white wine to the gravy.
- Sheet pan chicken – Make this into a sheet pan meal by baking in a large sheet pan with some vegetables. Roasted vegetables come out perfectly cooked alongside chicken. This is a great weeknight meal option.
Storage
Store the baked rosemary chicken in the refrigerator. Wrap it with aluminum foil or plastic wrap to give it an extra barrier of protection. Then place it in a storage container. It will last an average of 3-4 days.
You can also freeze it. Make sure the chicken is cooled down to room temperature and put it in a freezer bag or freezer-safe container. It will last 1-2 months in the freezer.
Common Questions
How Do You Know If Chicken Is Done?
The best way to know if the chicken thighs are done is by using a meat thermometer. It needs to read 160 degrees F. when it’s removed from the oven. Then it will finish cooking as it rests for a few minutes.
If you don’t have a thermometer, keep in mind these things. You don’t want to ever consume chicken that appears to be raw or bloody. When you pierce the chicken and juice runs out, it should be clear and never bloody or brown. If it is, then it needs to bake longer. The meat should be firm when it’s done too, not soft like when you first put it in the oven.
Do I Have To Use Fresh Rosemary?
Yes, for the best results possible, it’s best to use fresh. If you don’t have access to fresh and you want to use dried, make sure to use no more than ⅓ of what the recipe calls for. So, in this case, you need a total of 3 sprigs, which would equal 1 tablespoon of fresh rosemary. Because you are using dried, you don’t want to use more than 1 teaspoon worth.
Due to the fact that dried herbs have a much stronger flavor, you don’t want to use more than needed. If you do, there is a strong possibility that it won’t taste good because it will be too strong.
If you love rosemary as much as I do you will also want to try this Lemon Rosemary Seasoning!
How Do You Reheat Baked Chicken Thighs?
For reheating, you can use the microwave to warm it up quickly. Otherwise, bake it in the oven at 350 degrees for 12-15 minutes. It’s best if you add about ½ cup of chicken broth or water to the dish. It will help steam it and keep it moist instead of drying it out. It doesn’t take long to get hot; then you can serve.
Want to Save This Recipe?
Enter your email below & we’ll send it to your inbox. Plus get great new recipes from us every week!
By submitting this form, you consent to receive emails from Joy Filled Eats

Baked Rosemary Chicken Thighs
This rosemary chicken is incredible, and it comes together with just 5 ingredients!
Gravy:
- 3 cups cooking liquid from the chicken add additional broth if needed
- 1 tsp xanthan gum
- 1/2 tsp salt
- 1/8 tsp pepper
- 1 sprig fresh rosemary
-
Preheat oven to 350.
-
Put the chicken thighs, garlic, and rosemary in a large casserole dish. Drizzle with the olive oil and sprinkle with the salt.
-
Bake for 35-45 minutes or until the chicken is 160 degrees when checked with a meat thermometer.
-
Carefully pour the cooking liquid into a small saucepan. Add the salt, pepper, and rosemary. Sprinkle with the xanthan gum. Cook over medium heat, whisking, until it has thickened. Season with additional salt and pepper if desired. Serve with the rosemary chicken.
Calories: 372Carbohydrates: 1gProtein: 54gFat: 15gSaturated Fat: 3gCholesterol: 269mgSodium: 699mgPotassium: 703mgFiber: 0gSugar: 0gVitamin A: 70IUVitamin C: 0.7mgCalcium: 30mgIron: 2.3mg
Like what you see? Follow me on Facebook and Instagram! Love this recipe? Leave a comment & a 5-star rating right here! Make sure you don’t miss new recipes by getting email updates!
Originally Published December 15, 2019. Revised and Republished October 7, 2025.